Braised Beef Ragù – A Little Spoon
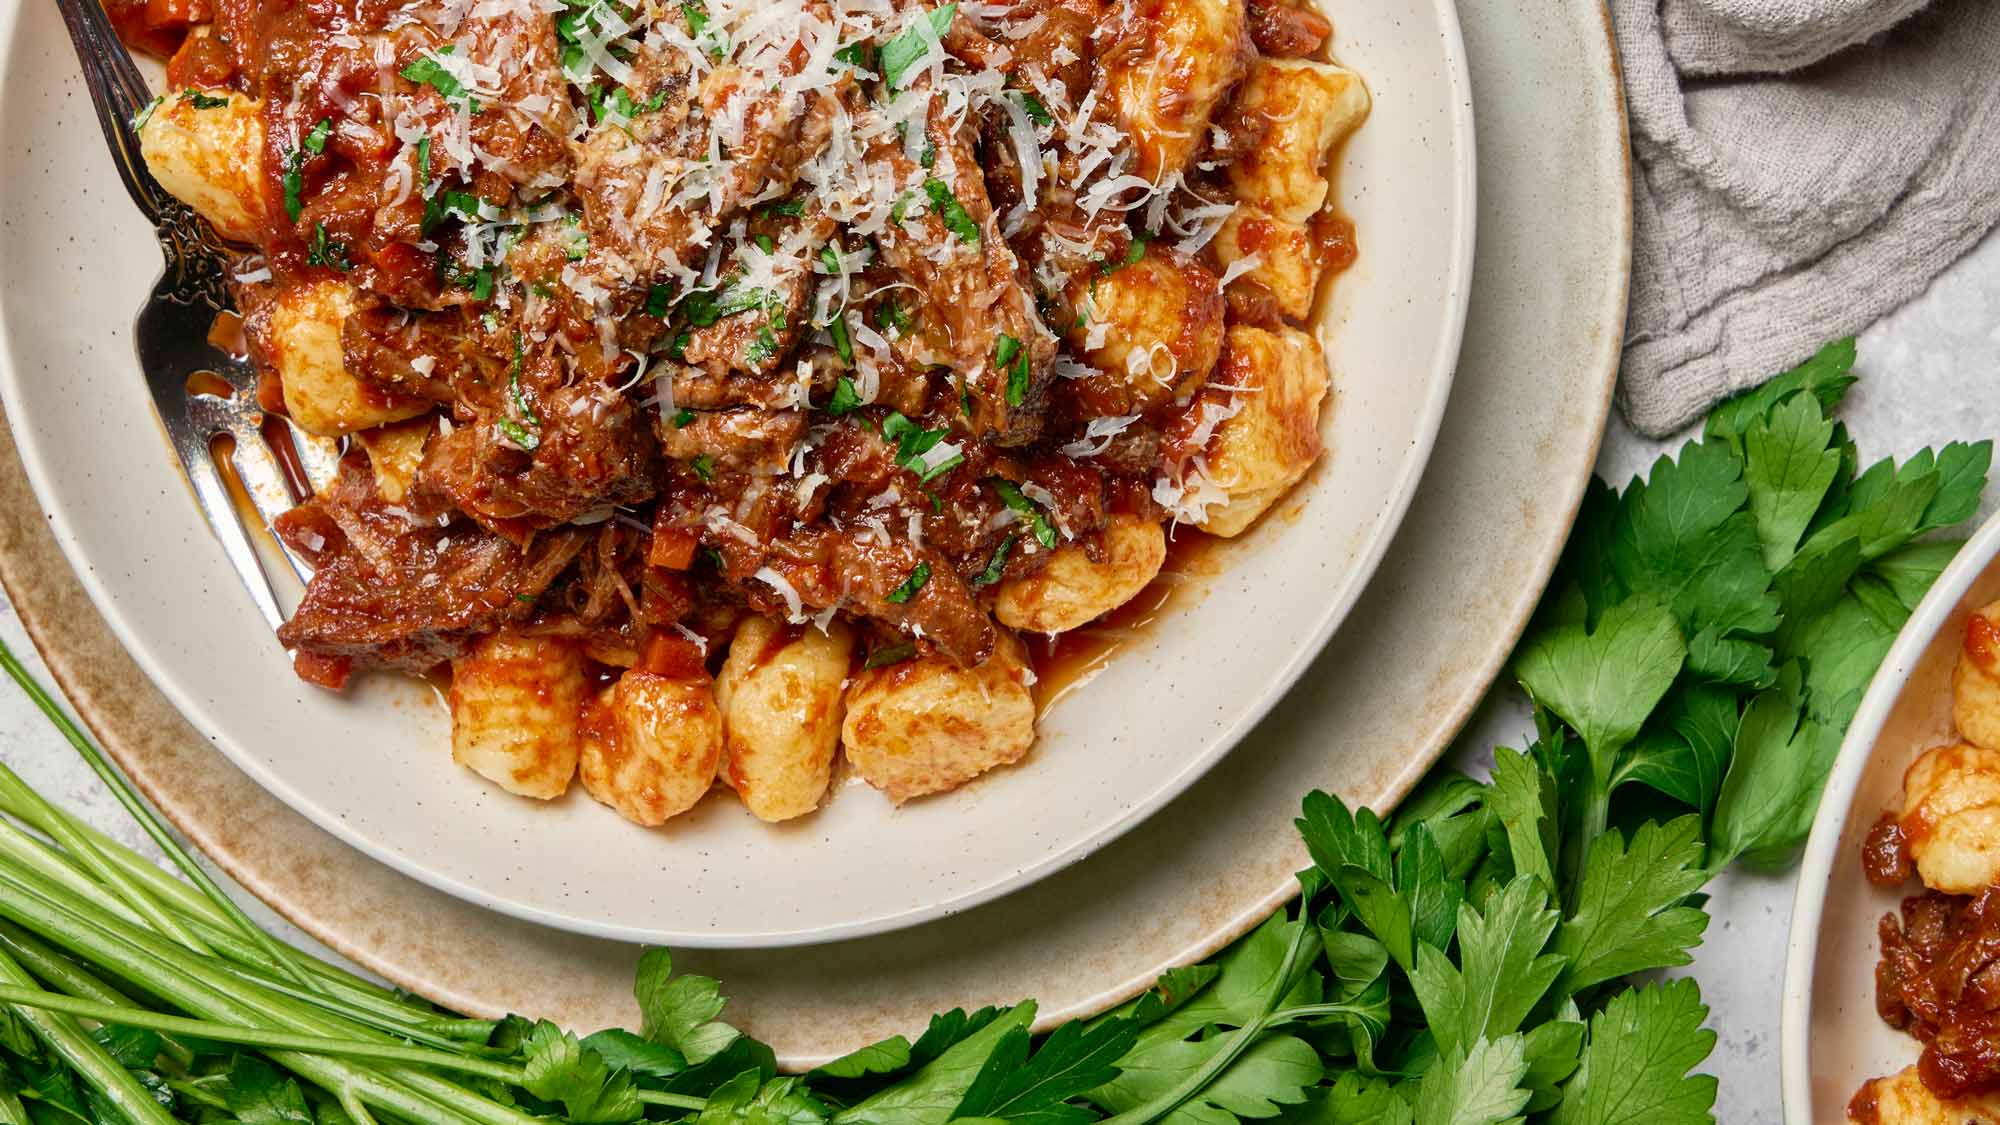
Every time I see the word “braised” on a restaurant menu, I am helpless to its call. And Braised Beef Ragù is no exception. It’s savory and warming and my personal benchmark for comfort food. Autumn and winter are braising season. (Don’t talk to me about soup season. That runs year-round, and you can’t convince me otherwise.)
If you haven’t explored my other recipes yet, I’ll let you in on a little secret. Passive cooking is my favorite culinary technique. Long simmers, braises, rests, and proofs are truly your best friend when it comes to developing the best flavor and texture possible. I know, long cook times can be intimidating or seem frivolous in a world that feels like it’s built around 30-minute meals, but most braised recipes also re-heat amazingly (can you say 10-15-minute meals???). I would gladly give up my afternoon to have this gently simmering away while I do other tasks. And then have this meal frozen and ready to go on the days when I need a family-style meal the most.
Mirepoix, also known as, Soffritto, Sofrito, Suppengrün, or Holy Trinity, etc. in cooking, is a combination of aromatics that are sautéed down to create a subtle flavor base for things like soups and stews. These base ingredients change regionally or culturally but are repeated over and over in their cuisines.
Here are a few non-exhaustive examples for your consideration. The French and Italians use onion, carrot, celery. Germans combine carrot, celeriac, and leek. Creole and Cajun cooking are partial to onion, celery, and green bell pepper. Spanish, Latino, and Mexican foods tend to begin with some variation of onion, garlic, peppers, (sometimes tomatoes) and herbs. And Asian cuisines almost always have a base of garlic and ginger along with regional edits to the third ingredient. Look for Thai basil and lemongrass in Thai dishes, scallions or garlic chives in Chinese dishes, and onion in Indian dishes.
The important thing about prepping the mirepoix for this braised beef ragù is to make sure all of the dices are roughly the same size. (Of note, the thickness in both sets of perpendicular slices will determine how large your dice is.) With three distinctly shaped vegetables, this can be a little tricky.
1. Onions: Find the top of the onion, opposite of the roots, and chop it off to create a flat surface. Set the onion down, root-side up and slice the onion in half. From there, lay the onion down with the center on your cutting surface. Then, make vertical slices from left to right. Try not to detach any of the onion by cutting too far up to the roots. Keeping the slices together makes this so much easier. At this point, turn the onion 90 degrees and make a horizontal slice halfway up the height of the onion from base to root. This makes sure the pieces from very left and right of the onion don’t end up too big. From there, cut slices again running perpendicular to the first set of slices. This step will create your diced onion.
2. Celery: First, cut off the top of the celery below the joint where the leaves shoot out. Then, cut the bottom off where it fades from green to white. From there, slide you knife longways down the stalk to make 4-3 strips of celery. Try to keep them as even in thickness as possible. You’ll want them to be as close to the diced onion pieces as possible. One-at-a-time or in a stack, line up the celery stalk(s) horizontally, and cut to create diced pieces.
3. Carrot: Peel the carrots and cut the top and very bottom off before moving to slice anything. Because carrots change in diameter from top to bottom. If a carrot tapers a lot, I like to cut it into three sections, thick, mid-sized, and narrow. This allows me to better maintain the size of my dice. After that, I’ll start by cutting the carrot batons in half. When you have a flat surface for stability, you can then slice the pieces down further to the correct thickness. Once you have relatively uniform strips, one-at-a-time or in a stack, line up the carrot pieces, horizontally, and cut to create diced pieces.
TIP: If you have any pieces that are too thin or small, save them. The same goes with the tops and bottoms of the celery, the carrot peels, and the tops and bottoms of the onions. Keep the scraps in a bag in your freezer and unearth them whenever it’s time to make stock again.
There are several options this step in the process.
1. Use your hands: pour the whole peeled tomatoes and their juice into a med bowl. Go from tomato to tomato and pinch off the tough, yellow tops where the stem would have connected the tomato to the plant. Throw the tops away. They are very fibrous and won’t break down during cooking as well as we’d all like. Then, use your hands to crush the tomatoes into a chunky sauce.
2. Use a blender: Dump the whole can, tomatoes and juice, into a blender and let it blend for 30-60 seconds. That’s it! This option will give a silkier texture to the ragù, if that’s your preference. On the plus side, you also get to keep your hands clean. But then you also need to clean a blender.
3. Take a shortcut: Purchase crushed tomatoes instead. As long as there are no herbs or seasoning in the sauce surrounding the crushed tomatoes, this is a great shortcut option. I would not recommend purchasing canned tomato sauce or diced tomatoes. Sauces almost always have flavoring added to them and diced tomatoes can still have the fibrous tops included.
When searing beef, especially for braised beef ragù, you need to control 3 things, temperature, moisture, and char.
1. Temperature: When it comes to searing, a dry pan plus high heat is the way to go.
First, you need to make sure your pan is properly heated before the meat is added. To do this, place your pot or Dutch oven on the burner and turn the heating element to medium-high or high heat. Let it sit until you can really feel the heat coming off of the bottom of the pot. At this point, wet your hand a bit and flick water at the surface. If the water droplets bead up and skitter around the pan as they evaporate, the pan’s temperature is sufficient. If the droplets bubble up and steam off where they land, wait another 15-30 seconds and try again. Once the water correctly reacts, let it evaporate off and then add in the oil. When the oil ripples, you are ready to sear.
Second, it’s important to maintain the surface temperature of the pot. If it drops too low, once you begin searing, you will lose the lovely brown crust you are looking to create. This can happen if you crowd the pan and lead to our second issue of controlling moisture.
2. Moisture: Moisture is the enemy of searing at the beginning and near the end.
Initially, any moisture on the surface of the meat will make it stick to the surface of the pot. Don’t worry, the beef will release from the bottom of the pot when it is ready to turn. Don’t rush things. Let the food tell you when it’s ready to flip. You won’t be able to completely remove all moisture, but patting down the cuts with paper towel before searing will go a long way in this department. Excess moisture will also cause spattering with the oil because oil and water don’t mix. This step makes for safer cooking. And safer is better when it comes to oil. Believe me!
As you continue searing the cuts of meat it’s important not to crowd the bottom of the pot. Depending on the size of the surface, you may even need to cook in several rounds. Why? Well, as the meat cooks it will release drippings, a combination of water and myoglobin (a protein that turns read when exposed to oxygen). If the pot is crowded, these juices will collect and stop a crust from forming. The more space for the moisture to evaporate out, the better.
HOWEVER, you also need to keep track of the fond on the bottom of the pot which can only be controlled with lower temperatures and water/moisture. Ahh the paradox of cooking! Am I right?!
3. Char: Controlling char is technically done through managing the first two items in this list, but it’s an important element to searing, so I gave it its own point.
Here’s the deal. Searing means high heat. And high heat means caramelization and the Maillard reaction. When searing, amino acids (the building blocks of proteins) and reducing sugars react to create compounds responsible for the brown crust on steaks we so love. But as these sugars and proteins form on the surface of the meat, they also build up on the bottom of the pot. We call this the fond. The fond is full of flavor and it’s going to make this braised beef ragù exceptional. However, you have to be careful not to burn it or you’re stuck with only the flavor you’ve built up on the meat. In situations where hot/darker spots develop in the pot, it’s a good idea to keep some water handy to deglaze just those areas a little at a time.
It’s still important not to have too much moisture. So, add water to just that spot then move the meat over the area to mop up the deglazed fond. Then, let it dry back out and continue searing. This gets touchier the longer you cook, but it’s easy to see where spots are getting too hot so it’s not something you need to be an expert at.
You have a few other options. Traditionally a sachet is made by cutting a piece of cheesecloth, placing the herbs and spices in the center, folding the edges up to form a pouch, and tying them up with cotton string. I don’t use this, because it just seems like a lot of work.
If you don’t have cheesecloth, you can also use a tea ball. Depending on its size, you will either be able to fit just the spices or the spices and the herbs. Usually, the metal tea balls are relatively small, so just the spices would fit.
If you can contain the spices but not the herbs/peel, make a bouquet garni (bundle of herbs) by tying them together with cotton string. Steep them in the soup just as you would the sachet.
If you can’t bundle the herbs, you can just toss the sprigs and peel into the sauce and fish them out in the same way as you would the parmesan. It’s just going to be more work to find smaller objects.
If you really don’t have a way to contain the whole spices, the best thing you can do is add them, as ground spices, at the same time as the umami mixture. Substitute the whole spices for 2-3 cloves, ground up to about 1/16 tsp. (The technical term is smidgeon, but really, it’s just a very small pinch.
Unfortunately, it’s too little to weigh, so I can’t provide anything other than volumetric measurement.) and 1/2 tsp (.6g) ground black pepper and combine them with the umami paste’s spices. Then, follow the rest of the braised beef ragù instructions as written.
The great news is, braised beef ragù defrosts and re-heats very well since there isn’t any large pieces of water heavy vegetables or dairy. To re-heat, simply put it in the microwave for several minutes on high or heat it up in a pot on your stove top. As long as the meat is re heated in liquid, everything will stay soft and tender.


Post Comment